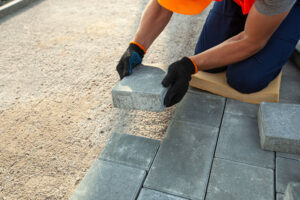
How to Cut Paving Slabs
Cutting paving slabs is a straightforward job when you have the right tools and know what you’re doing. By following this comprehensive guide by Minster


If you’re laying paving slabs yourself, mixing mortar is a fundamental part of the process, since paving slabs are usually bedded on mortar. However, many people don’t know how to get started or may be afraid that the process is a complicated one. Fortunately, this guide by Minster Paving is here to help you by concisely taking you through the process step-by-step so you can feel like a professional and ensure your garden projects stand the test of time.
Mortar gives your paving slabs a secure base, acting as a “binder” for when you install the slabs. Mortar provides several benefits for your slabs, such as strength, durability, stability, adhesion, and versatility, ensuring that the finished paving surface is capable of withstanding the demands of outdoor use while maintaining its integrity and aesthetics for years to come.
Like any other DIY project, there are important safety considerations to consider when mixing mortar. It is important to wear appropriate PPE, such as gloves, safety goggles and a dust mask since the process involves dust and other airborne particles. Ensure this task is carried out in a well-ventilated area to reduce your exposure to dust and harmful fumes. You should avoid direct skin contact with wet concrete or mortar since these can cause irritation and burns. Wearing a long-sleeved shirt is recommended. As always, follow the user manuals provided.

Having a clean, tidy workspace to work from is important for this process, in order to avoid accidents and save yourself from a more tedious cleaning job at the end. Ensure you’re mixing your mortar on a flat, stable surface, and place plastic sheets down to protect the ground from spilt mortar – remember, grass and mortar don’t mix well!
It could also be beneficial to prepare the area where the mortar will go so that the space is ready to be worked on right away. Clear away any debris, weeds or existing paving, and ensure the ground is level and compacted.
Measure the required amount of cement and sand according to your chosen ratio (explained shortly). Use a shovel, bucket, or measuring jug for accurate measurements. The ratio of cement to sand varies depending on the desired strength and application of the mortar mix. A common ratio for mortar is usually around 3-4 parts sand to 1 part cement, and for general-purpose concrete, 1 part cement to 2 parts sand to 4 parts aggregates.
Top Tip: We recommend that, to begin with, you measure around half of the intended materials you’re going to need, as the mortar dries quickly. You’ll be saving the other half for fresh use afterwards, repeating the process.
In your mixing container, combine the measured amounts of cement and sand. Use a shovel to thoroughly mix the dry ingredients together, making sure there are no clumps and the mixture is uniform. If any of the dry ingredients contain clumps or large particles, use the shovel to break them up before mixing, preventing the uneven distribution of materials.
Gradually add water to the dry mix while continuously mixing. Start with a small amount of water and add more as needed to achieve the desired consistency. Aim for a mix that is workable but not too wet. Continue mixing the mortar thoroughly until it reaches a uniform consistency. Use a folding motion to incorporate the water into the dry mix, scraping the sides and bottom of the container to ensure even mixing.
The ideal consistency of the mix should be similar to thick oatmeal or cake batter. It should be wet enough to easily mould into shape but not so soupy that it loses its form. If the mix is too dry, add small amounts of water and continue mixing until you reach the desired consistency. If it’s too wet, add more dry ingredients (cement or sand) accordingly.
Before using the mortar mix, perform a slump test by filling a cone-shaped mould with the mixture and then removing the mould. The mortar should retain its shape but slightly slump. Adjust the mix, if needed, to achieve the desired slump, and remember, this process involves trial and error, so this may take several attempts to perfect!
Once you have achieved the desired consistency and tested the mix, it’s ready for use. Use the mortar promptly before it starts to set. This is where ensuring you’ve prepared your intended space comes into play, as mortar needs to be laid down quickly. If you need to store it for later use, cover the mixing container with a damp cloth to prevent it from drying out too quickly, otherwise all your efforts will be wasted!

By following these steps, you can successfully mix mortar for garden paving purposes and create a beautiful and durable outdoor space. Remember to work efficiently and carefully to achieve the best results, and stick to your safety guidelines throughout. Want to read more of our how-to guides? Explore our range of useful top tips, from how to cut paving slabs and how to lay them.
Minster Paving is your go-to location for all things paving, to suit any design or budget. If you’re looking for a fresh new patio, or a stylish driveway, look no further. Explore our range, or get in touch with us today to find out more about how we can help you build your dream paving designs.
Cutting paving slabs is a straightforward job when you have the right tools and know what you’re doing. By following this comprehensive guide by Minster

How Much Fall Should a Patio Have? This is the question that many people ask when they begin to build their first patio. We’ve created


