How to Cut Paving Slabs
Cutting paving slabs is a straightforward job when you have the right tools and know what you’re doing. By following this comprehensive guide by Minster


Laying paving slabs on sand is one of the most popular DIY methods for crafting a patio or garden pathway; it’s a cost-effective alternative to traditional mortar beds, and easy to adjust. Through careful planning and proper execution, you can master this flexible approach, and our compact guide is designed to make this process as easy as possible!
This how-to guide will address exactly how to lay patio slabs on sand and provide you with expert maintenance tips from our paving experts. Oh, and if you’re looking for somewhere to purchase the highest quality paving, you’re in the right place.
Before you begin this process, keep in mind that laying slabs on mortar instead of sand may give you a longer-lasting patio, driveway, or path. Although sand-bedded slabs are a common method, they may cause drainage inconsistencies, and you might experience signs of instability and damage to the paving sooner than the mortar method.
However, proper maintenance (explained later) can help your sand-bedded slabs stay in great shape for longer, protecting your patio’s functionality. You should also ensure that you use sharp sand, which locks together when compacted, rather than fine building sand, which is much more unstable

Using a tape measure and string line, mark out the area where you plan to lay the slabs and ensure the edges are straight. Excavate the soil to a depth of around 150mm, removing any grass, plants, or rocks to clear the way for your bedding layer. If you’re planning on placing heavy items on the slabs, such as a shed, you may want to dig a little deeper.
Spread two courses of MOT Type 1 sub-base (about 50mm thick for each) and compact them using a tamper or plate compactor for stability. Next, add a 30 to 50mm layer of sharp sand and level it with a rake and straight edge. Compact the sand to create a firm, stable bed for your slabs.
Use a spirit level to ensure that your surface is even, and, using a shovel, address any areas which are higher or lower than they should be. However, remember to slightly slope the surface away from any buildings, allowing proper drainage.
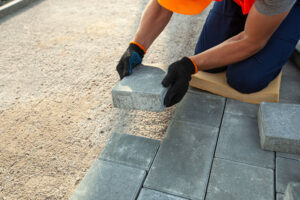
Begin laying the slabs in your chosen pattern, starting from one corner or edge and working your way outwards. Gently tap each slab into place with a rubber mallet, and use your spirit level to ensure it is even with the neighbouring slabs.
Some types of paving slabs may expand and contract more than others during colder, warmer, or wetter weather conditions. To account for this, you should allow a small gap of 1 to 2cm between each slab, so that the paving doesn’t shift during any expansion or contractions.
Once all the slabs are laid, fill the gaps between them with kiln-dried sand. Sweep the sand into the joints using a broom, ensuring it’s compacted into place. If necessary, add more sand and repeat the sweeping process until the gaps are fully filled. Finally, clean the surface of any excess sand and check that all slabs are stable and level.
To protect your slabs over time, there are several simple tasks which you should keep in mind. These include:
To create a beautiful-looking, well-put-together patio, driveway, or pathway, you’ll need the best quality paving slabs. At Minster Paving, we’re proud to say that we produce and stock only the best natural stone, slate, porcelain, and manufactured paving! Featuring a range of different colours, patterns, and textures, we’ve got something to suit every design or budget.
To get your hands on our beautiful products, simply browse our range online, or visit our Oxfordshire-based site. If you have any questions, please don’t hesitate to ask; our paving experts will have the answers. Simply give us a call at 01865 300252, or contact us online today.
Cutting paving slabs is a straightforward job when you have the right tools and know what you’re doing. By following this comprehensive guide by Minster

How Much Fall Should a Patio Have? This is the question that many people ask when they begin to build their first patio. We’ve created


