01865 300252
Call us: 01865 300252

How to Prepare an Area for a Patio

patio uk

Patios are an exciting addition to a garden, improving aesthetics and creating a functional, dynamic space for those using the property. However, to ensure the longevity of your patio, proper installation is needed, so how do you go about this? This article will explore how to prepare an area for a patio, offering a step-by-step guide on what you should be doing to maximise success.

Why Lay a Patio?

patio near sea

Laying a patio offers numerous benefits, including:

  • Increased Home Value: Enhances curb appeal and adds value to your property.
  • Outdoor Living Space: Provides a functional area for dining, entertaining, and relaxing.
  • Low Maintenance: Patios require minimal upkeep compared to lawns and gardens.
  • Durability: Made from materials like concrete, stone, or brick, patios are long-lasting and withstand various weather conditions.
  • Versatility: Customisable in design, size, and material to match your aesthetic and functional needs.
  • Improved Drainage: Properly installed patios can help manage and direct rainwater away from your home.
  • Extended Living Area: Increases usable living space without the need for an expensive home extension.
  • Safe Surface: Provides a flat, stable area, reducing the risk of trips and falls compared to uneven ground.
  • Year-Round Usability: Offers a usable outdoor area in all seasons, particularly if combined with features like fire pits or heaters.

What Materials and Tools Will I Need?

  • Trowel
  • Rake
  • Tape measure
  • Sand
  • Cement
  • Sub-base
  • Stakes and string
  • Plate compactor
  • Spirit level
  • Patio paving slabs or stones
  • Edge restraints
  • Brush
  • Safety gear (gloves, safety glasses, etc.)

9 Steps to Prepare an Area for a Patio

  1. Plan and Design: Firstly, determine the size, shape, and location of your patio. Consider sun exposure, proximity to the house, how you plan to use the space, and what paving slabs or stones you plan to use (and whether you could add a feature kit to this). Before you get started, read our “Designing Your Patio Area” guide.

  2. Mark the Area: Use stakes and string to outline the patio area. Ensure the lines are straight and the corners are square by measuring diagonally across the area (the diagonals should be equal).

  3. Excavate the Area: Next, dig out the marked area, allowing for a 100mm sub-base, roughly 50mm of mortar and the thickness of your paving slabs or patio stones. Ensure the excavation has a slight slope away from any structures for proper drainage. 

  4. Prepare the Sub-Base: Remove any large roots or rocks, level the soil with a rake, and compact it using a hand or power compactor. Mark the 100mm height of the sub-base using stakes, adding further stakes across it to ensure a consistent height. Spread a layer of sub-base evenly across the excavated area using a plate compactor to compact it until it’s level with the stakes. 

  5. Mix the Mortar: For the next step, mix the mortar for your slabs to bed onto. It’s important to note that because mortar dries quickly (within 2 hours), only mix what you think you’ll use. To do so you’ll need to mix 4 parts sharp sand with 1 part cement (using a bucket for measuring). If you’re using porcelain, a primer underneath the porcelain is necessary to ensure that the porcelain sticks to the mortar bed. Porcelain paving is not porous, so the primer acts as a bonding agent to help it stick, ensuring that there are no rocking slabs. 

    Either by hand or with a cement mixer, pour ¼ of a bucket of water into your cement mixer or mixing bucket alongside the cement mix and sand. Mix this to find the right mortar consistency, adding more sand or water if needed; it should be damp, not runny!

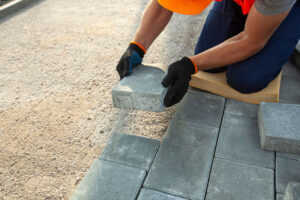
  6. Lay the Paving Slabs: Begin laying the paving slabs or patio stones starting from one corner and placing them in the desired pattern. Maintain consistent spacing between the slabs (use spacers if necessary). Periodically check the level of the pavers using a spirit level, and tap them into place with a rubber mallet if needed (tip: place a piece of timber on top of the paving slab to avoid hitting the slab directly). Using a trowel, fill in any gaps under each slab so the mortar is flush with the bottom of the slab.

  7. Install Edge Restraints: Once all the paving slabs are laid, edge restraints can be installed around the perimeter to hold the pavers in place (although, this is optional as the mortar should also hold the slabs in place). These edgings can be plastic, metal, or concrete. Once they have been installed and you’re happy with the position of the slabs, leave the mortar to dry for approximately 48 hours. In the event of poor weather, cover the slabs with tarpaulin or another suitable cover. 

  8. Fill the Gaps: To lock the paving slabs in place, mix one-part kiln-dried sand with one part cement in a mixing bucket. Sprinkle this mix along the joints of each paving slab, brushing it in using a soft brush. Add more of this mix where necessary, and use a pointing towel to compress the joints until they are full. A traditional sand, cement wet mortar mix is fine, but should be applied with a trowel, not brushed in. The other alternative is a jointing compound such as Rapidflow, Joint-It, or Titan (we can advise the best types for each type of paving). These are quicker, less messy and frost-resistant if used in the correct conditions; great for inexperienced DIY-ers, as the traditional method can be tricky. 

  9. Final Touches: To finish off, clean off any excess jointing compound from the surface of the paving slabs. Inspect the patio to ensure everything is level and secure.

Top Tips for a More Successful Process

To ensure your process is as effective and successful as possible, we recommend following these top tips:

  • Wear safety gear throughout the process; your safety is paramount at all times. 
  • Take regular breaks to avoid fatigue, especially during excavation and compacting.
  • Ensure proper drainage by maintaining a slight slope away from structures.
  • Regularly check the level of the pavers to prevent an uneven surface.
  • To increase patio longevity, read our “Patio Winter Tips” and “How to Clean Patio Slabs”.

Choose Minster Paving for Your Patio Needs

If you’re considering laying a patio, look no further than Minster Paving. Our wide range of paving slabs are designed to fit any design or budget, so no matter what you have in mind, we’ll have something for you. If you have any questions, don’t hesitate to get in contact with us.

More To Explore